Showing posts with label HTML & Design. Show all posts

3/01/2014

How to disable right click on your blog

3/01/2014

Assalamualaikum and hi. This tutorial was requested. This tutorial is on how to not let people right click on your blog. This action will prevent copycat from opening your page source. Talking about page source...why don't we just let them be because actually there are many other ways to open page source even if you disable the right click.

However, if you still intended to disable right click, follow the following steps. Oh!  I want to tell you that both Classic Template and Blogger Template Designer can use this method.

1. For Classic template, go to Home > Template > Edit Template HTML
1. For Template Designer, go to Home > Template
2. Search for <body> in your HTML context box
3. Now, replace the codes you have found earlier to this:
<body oncontextmenu='return false;'/>
4. Save and try to right click on your blog! :)

1/08/2014

Image style by using various border-radius trick!

1/08/2014

gambar contoh asal - not mine


<img src="IMAGE URL" width="200" style="-moz-border-radius: 50%; -webkit-border-radius: 50%; border-radius: 50%; " />

<img src="IMAGE URL" width="200" style="-webkit-border-radius: 50%; -webkit-border-bottom-left-radius: 0;-moz-border-radius: 50%;-moz-border-radius-bottomleft: 0;border-radius: 50%; border-bottom-left-radius: 0;" />

<img src="IMAGE URL" width="200" style="-webkit-border-radius: 50%; -webkit-border-bottom-right-radius: 0; -moz-border-radius: 50%; -moz-border-radius-bottomright: 0;border-radius: 50%; border-bottom-right-radius: 0;" />

<img src="IMAGE URL" width="200" style="-webkit-border-radius: 50%; -webkit-border-top-right-radius: 0; -moz-border-radius: 50%; -moz-border-radius-topright: 0; border-radius: 50%; border-top-right-radius: 0;" />

<img src="IMAGE URL" width="200" style="-webkit-border-radius: 50%; -webkit-border-top-left-radius: 0; -moz-border-radius: 50%; -moz-border-radius-topleft: 0; border-radius: 50%; border-top-left-radius: 0;" />

1/04/2014

Comment box Styling for Denim Template

1/04/2014

 Assalamualaikum,


Haritu den buat yang simple template kan? Harini untuk denim pulak, tak berapa reti denim tapi akhirnya jadi jugak. Tapi lain sikit lah.  Ekceli taknak buat tuto denim tapi ramai jugak yang tanya so saya buatlah :) 

  1. Pergi ke Blogger Dashboard > Template > Edit HTML
  2. Cari code /* Footer
  3. Paste codes yang saya bagi ni dekat ATAS /* Footer tadi.


  4. Warna text, background semua pandai-pandai lah ubah eh ^-^
  5. Kalau dah siap, Preview . Save
Masa saya buat ni, saya pilih setting comment pop out window, so kalau yang lain tak jadi bagitau lah ye. 

Wasalam.

12/31/2013

Everything about border for newbies

12/31/2013

Assalamualaikum,

So yea saya buat benda ni sebab saya selalu post code tanpa terangkan apa yang boleh diubah. Perangai seperti ni tak ubah seperti cikgu akaun saya pada tahun lepas, hampeh tak faham. Mungkin ada yang tak tahu kan?  Tapi takpe, meh belajar. Ni ikut apa yang saya tau jelah, banyak sangat yang saya tak tau , maaf T_T (so den buat research sikit)

property border:

ketebalan :


jenis border:

Jenis dia ada banyak, boleh rujuk bawah ni :

dotted


dashed


solid


double ( 3px keatas )


groove ( 3px keatas )


ridge ( 3px keatas )


inset


outset


warna border :

Code warna, boleh ambik dari sini -> http://hexcolorgenerator.com/


border-width, border-style dan border-color


Property Border:1px solid #000000; dekat atas ni sebenarnya combinasi code  border-width, border-style dan border-color. Kalau nak guna property border-width, border-style dan border-color dalam css pun boleh, tapi ketiga-tiga property kena letak.

contoh :

border-width:10px;
border-color:#FFBBBB;
border-style:solid;


Yang bestnye guna property border-style ni, kita boleh guna sampai empat style !


border-style: solid dotted;
border-style: (atas dan bawah) (kiri dan kanan);

border-style: solid dotted dashed;
border-style: (atas) (kiri dan kanan) (bawah);

border-style: solid dotted dashed groove ;
border-style: (atas) (kanan) (bawah) (kiri) ;


Border-color pun, boleh guna sampai empat warna.

border-color:#FFBBBB #DACBEF;
border-color: (atas dan bawah) (kiri dan kanan);

border-color:#FFBBBB #DACBEF #F1EBC8;
border-color: (atas) (kiri dan kanan)(bawah) ;

border-color:#FFBBBB #DACBEF #F1EBC8 #C8E9F1;
border-color: (atas) (kanan) (bawah) (kiri) ;


Sorry kalau tak faham sebab saya selalu syok sendiri. Hihi. Sebarang soalan, boleh komen :) Wasalam

Mohon jangan repost tanpa kebenaran.

 rujukan rujukan

12/30/2013

How to have tutorial list like mine! - Style 2

12/30/2013


Please click the Live Preview because this tutorial list have a special hover effect.

To get this list codes, copy the codes down here and paste it on http://htmledit.squarefree.com/ and edit it there! Honestly, I need to remind you this is the easiest way to edit codes.

Replace LINK with your tutorial link and replace Tutorial: with your own tutorial titles. 

To apply this codes, go to your tutorial page, and paste the codes on the HTML side, preview it and save! For Classic Template just paste the codes to where you wanted the tutorial list to be.

12/28/2013

How to add navigate-able box to your blog - Style 4

12/28/2013

Click here to see live preview.
To have this kind of tab simply follow instructions below. 
1. Copy and paste these codes to http://htmledit.squarefree.com/. In this website you may edit this tab the way you want, you may change the colors, the style, and the content of this tab box. 
2. Once done, go to Home > Layout > Add  a gadget > Pick HTML/Javascript
3. Paste the codes you have edited and save immediately. Do not click 'Rich Text' or else the codes will automatically corrupted. 
Goodluck! Any questions and problem you may comment down below or ask me on my Ask.fm.

12/25/2013

Add blogger Archive For Classic Template /Blogskins - Style 2

12/25/2013

Assalamualaikum, thank you for requesting this tutorial. I am currently using this blog archive style. If you touch the title, you will see a special hover effect! I am sorry that I don't provide live preview this time. 

1. Go to Dashboard > Template > Template HTML
2. Paste this code before/above </style>


3. Then, paste this code in your sidebar section code.


4. Now you are done! :)

12/23/2013

How to download and Install fonts to your windows.

12/23/2013

Assalamualaikum, someone asked me where did I get all the fancy fonts in my laptop. You can install various fonts but make sure that you are aware of the font owner's regulation. Some allow you to use the font for personal use only, it means that you will need to pay or buy the font if you want to use it for commercial purposes.  Some allow you to use for personal and also commercial use. Just a simple reminder from me.

Okay, let's start downloading the font!

1. The first step, click this link - Dafont and browse your favorite fonts in here. I am very sure you will favor a lot of fonts here.
2. Once you have chosen the font, click Download. Downloading will only take 1-5 seconds depending on your connection. One thing for sure, font files are not really big so you don't have to worry.

3. Once you have done downloading, click on the download file arrow and click "Show in folder" to be redirected to it file location. 


4. Now right click the font zip file and extract the file by clicking "extract files"


5. Once you have done extract the file, you will see the direct font file. If you can't find it, try to find a folder with related font name. It must be there! 
6. Now right-click the font file, click Install.

7. You will see a pop out window stating "Installing font" and the process will take about 3-5 seconds only. Now you have your favorite font in your windows! 

12/22/2013

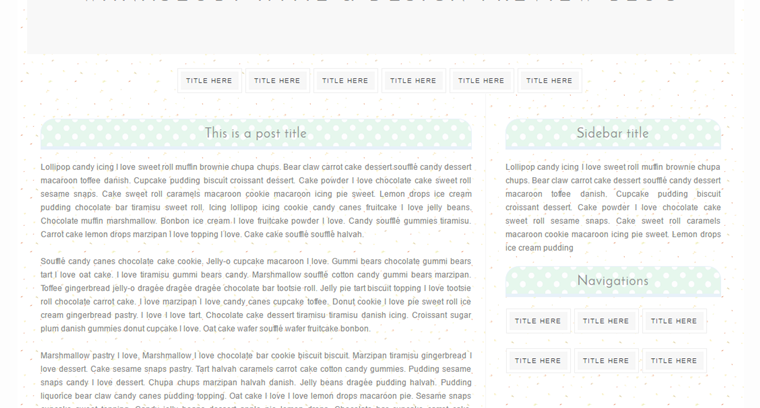
How to style your sidebar or post title - Style 2

12/22/2013

Hi. Today I'm gonna update the second version of "How to style your sidebar or post title"! This time I added a hover effect to the title. I use kawaii polkadot background but you can always change the bakground to  suit your blog style! 

Click here to see the live preview.

To apply this style to your post and sidebar title, follow the following steps. The steps seem complicated but trust me, it is easy. Just follow the steps carefully so that you won't messed up your blog!

For Post title

1. Go to Dashboard > Template >Edit HTML 
2. Click in the HTML box > and press CTRL + F to search code.
3. Paste this code under <head>
<link href="https://fonts.googleapis.com/css?family=Josefin+Sans" rel="stylesheet"/>
4. Then, search for h3.post-title.
4. You will immediately directed to this code: Don't worry if the codes inside the { and } look different than yours because you might have followed other styling tutorial before. I am using the original and untouched white simple template from Blogger.

5.  Remove the codes I highlighted, and replace them with this:


6. You are done!


For Sidebar Title

1. Search for div.widget > h2 and you will find something like this.

2. Just as the Post title, remove the whole codes that I have highlighted and replace the codes with this:

3.Now you are done!

Thank you for reading :)

12/16/2013

Add grain background to your blog main body

12/16/2013

This is also a quick update. This tutorial was requested by a person on my Ask.fm. Thank you for asking!


To get this grain background on your blog's main body, follow this simple steps! 

1. Go to Dashboard> Template> Edit HTML
2. Search for ]]></b:skin> and paste this code ABOVE/BEFORE it.
.post-body,.content-inner {
background:url(https://blogger.googleusercontent.com/img/b/R29vZ2xl/AVvXsEgZBnTl-3vzPqWE_R_OxB2686MRB74ALO2Yc4jBZYiKvcStSX9wUgnTxPBw_DvMr2SIIwGX4VskSCS_8G2Cy8eoArVaFqgy4oGQGBcMCvkF3-XSjKf8bmHKXYSxDDJeHqRNpuJXdCJoAvE_/s1600/bodybg.gif);}

3. Save template and you are done!

10/03/2013

How to make your blog archive in a scrollbox

10/03/2013

Assalamualaikum, this is a tutorial for Template designer. This is how your blog archive will look like in a scroll box.

1. You need to make sure that you have a blog archive gadget on your blog! To add blog archive gadget, go to Dashboard > Layout > Add A Gadget > Blog Archive
2. After that make sure you have refreshed the page and go to Template.
3. Click on the HTML box and press CTRL+F to search,
4. Search for  <div id='ArchiveList'> and paste this code UNDER/BEFORE it.
<div class="widget-content" style="background-size: 360px; background: #fff; border-radius: 10px; border: 1px dashed #ccc; color: #777777; height: 190px; opacity: 0.9; overflow-x: hidden; overflow-y: scroll; padding: 5px; text-align: left; width: 100%;">
8. Now search for </b:includable> , and put a </div> don the TOP of it.
Now your template code will be like this:
9. Now you are done! 

9/27/2013

Free Ask.fm Button

9/27/2013

This tutorial was requested by someone on Ask.fm. This is a quick update as the steps are really easy. To get this button, change "LINK ASK.FM" to your Ask.fm profile link - here is the example of the link http://ask.fm/wnsby

 
<a href="LINK ASK.FM"> <img src="http://i.imgur.com/ViZLyNx.png" style="width:200"></a>

<a href="LINK ASK.FM"> <img src="http://i.imgur.com/eognNeV.png" style="width:200"></a>


<a href="LINK ASK.FM"> <img src="http://i.imgur.com/Z4Zt93i.png" style="width:200"></a>

 
<a href="LINK ASK.FM"> <img src="http://i.imgur.com/zTIcq0f.png" style="width:200"></a>


<a href="LINK ASK.FM"> <img src="http://i.imgur.com/9iHDDTf.png" style="width:200"></a>


Thank you for reading! :)

8/03/2013

How to add Navigation Menu - Style 7

8/03/2013


To get this menu button, follow the instruction given below.

1. Edit the codes

To edit the codes, I recommend you to use http://htmledit.squarefree.com/ to edit while viewing the Live Preview immediately. The main codes that you need to change are - YOURLINKURL (Change this to your link url) & titlehere (Change this to your own menu title)

2. Apply the codes

For Blogger Template Designer user, you may put this navigation on your gadget section. Go to Home > Layout > Add a gadget > Choose HTML/Javascript > and paste the codes. 
For blogskins/ Classic Template user, you may put the codes anywhere you wanted the navigation to be.
Thank you :)

6/21/2013

How to style your sidebar or post title - Style 1

6/21/2013

Hi guys, starting from today I will update one by one post or sidebar title just for you guys! You can send a request to me on what style you want me to make for the next tutorial. As for Style 1, I make a very simple post and sidebar title style which will suit those with a minimalist theme! You may edit them to your own style too.

Click here to see the live preview.

To apply this style to your post and sidebar title, follow the following steps. The steps seem complicated but trust me, it is easy. Just follow the steps carefully so that you won't messed up your blog!

For Post title

1. Go to Dashboard > Template >Edit HTML 
2. Click in the HTML box > and press CTRL + F to search code.
3. Paste this code under <head>
<link href="https://fonts.googleapis.com/css?family=Josefin+Sans" rel="stylesheet"/>
4. Then, search for h3.post-title.
4. You will immediately directed to this code: Don't worry if the codes inside the { and } look different than yours because you might have followed other styling tutorial before. I am using the original and untouched white simple template from Blogger.

5.  Remove the codes I highlighted, and replace them with this:


6. You are done!


For Sidebar Title

1. Search for div.widget > h2 and you will find something like this.

2. Just as the Post title, remove the whole codes that I have highlighted and replace the codes with this:

3.Now you are done!

Thank you for reading :)

6/02/2013

How to remove attribution (Powered by Blogger) on your template designer

6/02/2013

Assalamualaikum and hi, this tutorial is to remove the attribution. Blogger refrains people from remove "Powered by Blogger" because this widget is locked. You can either unlock the widget or just remove the attribution codes. As I think removing the code would be better and easier, I'll only show you how to remove the code.

  Dashboard > Template > Edit HTML
  Click "Jump To Widget"
  Click Attribution1 
  You will be redirected to this code:
<b:section class='foot' id='footer-3' showaddelement='no'>
<b:widget id='Attribution1' locked='true' title='' type='Attribution'>
</b:section>
 Delete all of them and save.

5/31/2013

How to add Sticky Navigation Bar to your Blog - Style 3

5/31/2013

Straight to the point, click this link to see the live preview of the navigation bar -> Click here
For classic template, paste the code below under </style>
For blogger template designer, paste the code in add HTML/Javascript area.

4/23/2013

How to add Floating Navigation to your blog - Style 5

4/23/2013


Hi! Assalamualaikum. Today I will teach you on how to get this floating navigation. This is the fifth idea of the floating navigation. To browse other version of floating navigation that I have posted, please find the link on my tutorial list.

For classic template, copy and paste this code under/after the </style> in your blog theme code. For Blogger Template Designer users, copy this code and go to home > Layout > Add a gadget> HTML/Javascript > Paste the code on the HTML area.


As requested, this is the horizontal version of the navigation.

4/21/2013

How to have tutorial list like mine!

4/21/2013

Assalamualaikum and hi everyone! Today I will like to give you my Tutorial List codes that I am currently using right now. Click here to see the live preview of the tutorial list. The Live Preview is not a real one because I didn't provide the real text and real link. However, you will get the idea of the list by seeing the Live Preview.

To get this list codes, copy the codes down here and paste it on http://htmledit.squarefree.com/ and edit it there! Honestly I need to remind you this is the easiest way to edit codes.


Replace LINK with your tutorial link and replace Tutorial: with your own tutorial titles. 

To apply this codes, go to your tutorial page, and paste the codes on the HTML side, preview it and save! For Classic Template just paste the codes to where you wanted the tutorial list to be.

1/05/2013

How to add Navigation Menu to your blog - Style 7

1/05/2013

I will teach you on how to get the menu button of this style. This is the live preview of the button, you may hover your cursor over these menus to see the hover effect :)

link 1 link 2 link 3 link 4

To get this menu button, follow the instruction given below.

1. Edit the codes

To edit the codes, I recommend you to use http://htmledit.squarefree.com/ to edit while viewing the Live Preview immediately. The main codes that you need to change are - YOURLINKURL (Change this to your link url) & titlehere (Change this to your own menu title)

2. Apply the codes

For Blogger Template Designer user, you may put this navigation on your gadget section. Go to Home > Layout > Add a gadget > Choose HTML/Javascript > and paste the codes. 
For blogskins/ Classic Template user, you may put the codes anywhere you wanted the navigation to be.
Thank you :)

12/23/2012

Add Image border to your blog post image

12/23/2012

This tutorial was requested by someone. This is the live preview of the image. Not all images in your blog will have border, just images in your entry.

  1. Go to Home > Template > Edit HTML > Search for ]]></b:skin>
  2. Paste the codes given above/before ]]></b:skin>
Thank you for reading :)